Concrete Resources in Ogden, UT
Concrete Information and Tips
Even though concrete is a versatile substance it does have its limitations that you should consider. Concrete is affected by temperature, too hot and it dries with cracks, too cold and it takes forever to set-up. There are chemicals available that will allow experts to pour concrete in even the worst conditions, but trailered ready mix is not intended for these specialized applications. But if you make proper plans in advance you should be able to pour concrete anytime.
Most small concrete pours should be planned when temperatures are between 60 and 90 degrees Fahrenheit. This means that the concrete will begin to set-up in a reasonable time but won’t set-up before you have a chance to touch it up.
Hot Weather Tips
Plan ahead. If you can make arrangements to pour in the cooler time of the day, this will minimize the effects of trying to finish the concrete in the heat. Wet down all the forms and ground just before you pour in the concrete. This will reduce the rate of evaporation of the moisture in the concrete mix. Avoid adding water to the mixture because it will lower the strength, increase cracking and reduce the durability.
Limit the time between placing the concrete and final finishing. Use a fog type spray nozzle to maintain surface moisture and to prevent evaporating away the “bleed” water out of the concrete mix before it can be troweled smooth. Provide sunshades to control the surface temperature on the exposed surfaces. Erect windbreaks to reduce the chances of a dry wind that will cause the surface to cure too fast and crack.
As soon as the concrete is finished, begin a moist cure by keeping the finished surfaces and pour area damp for the next few days. On extremely hot or windy days, it may be best to reschedule the pour for a day with more favorable conditions.
Cold Weather Tips
Do not plan to pour concrete when the temperatures will not get above 60 degrees Fahrenheit. If you can wait until the sun is shining on the pour site, then wait. Use a concrete mix with a low water volume so that it will have less moisture to reduce the cure time. Provide a curing membrane that can be as simple as a plastic tarp or as sophisticated as a concrete curing blanket. It will take long to cure so you will want to take precautions to keep unwanted travelers from making an impression on your hard work.
Concrete Facts
Too much water weakens the Concrete causing sandy surfaces, peeling and chipping.
Too little water Causes the Concrete to cure too fast and will result in wind check and cracking.
Concrete will reach half its strength in 10 days and its full strength in 27 days hot days or windy days can affect the finish of your job.
Preparing for Your Concrete Project
Make Plans
A project made with concrete is so permanent that it could become a lasting monument to your lack of planning! Make sure you know exactly what you’re going to do and who’s going to help you before the concrete arrives.
Forms
Use 2″ x 4″ planks set on edge. Hold the 2″ x 4″ in place with stakes driven into the ground every 18 inches. The stakes must be on the outside of the forms and must be even with the top of the forms.
Tools You May Need
Tamper, Garden Hose, Bull Float, Rake, Steel Trowel, Hand Float, Wheelbarrow, Stakes, Soft Bristle Broom, 2″ x 4″ Screed Board, Square Nose Shovel. Most of these tools are for rent at Sandee’s Soil and Rock.
Concrete Arrives
(Make sure you have several people to help you–at least three people for three yards or less of concrete.) Wet your area several times the night before you pour your concrete and sprinkle the ground once before the cart arrives. This insures a good cure and also keeps the ground from drawing water from the concrete which means you will have more time to work the concrete before it sets. Pour concrete out of the Cart-Away trailer or wheelbarrow. Begin at the far end of the forms and dump each load close to the last. Use square nose shovels and rakes to spread the concrete evenly to the top of the forms.
Finishing and Curing
- Have two people use a 2″ x 4″ screed board to level the concrete, moving back and forth in a sawing motion as well as across the concrete.
- You can use a tamper to bring moisture and sand to the surface and to move large aggregate down into the concrete. Don’t be afraid to step out on the concrete but make sure you always move in a backward direction covering your foot prints as you go.
- Run an edger lightly around once following the tamping to establish a groove. This will simplify final edging.
- Next, use a long handled bull float. Back and forth strokes will smooth the ridges left by screening and tamping.
- Use the hand float with flat strokes in an arch motion. Do not apply pressure or you may cause a rough, sandy finish.
- Use the edger again following the hand float to produce a rounded edge that will not chip easily when forms are removed.
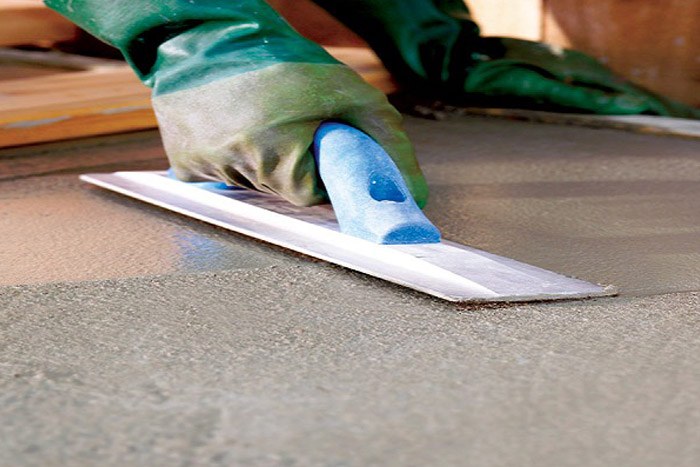
- When the concrete can hold a man’s weight and not make an impression and when it has lost its surface moisture, use a steel trowel to finish the surface. Kneel on a piece of board as you move across the concrete. Use firm, flat, even pressure in an overlapping circular motion.(OPTIONAL: you may create a broom finish after the steel trowel by dragging a broom with very soft bristles in one direction across the concrete.)
- To cure your project, dampen the area daily for 5 days.
- After you are finished and cured, remove the forms and enjoy your handiwork for years to come.